
This post may contain affiliate links which means I may receive a commission for purchases made through links. Learn more on my Private Policy page.
Are you tired of being limited by the battery options for your Milwaukee M12 tool? Have you ever wished you could use a Bosch battery instead? Well, you’re in luck! In this article, we will show you a simple and effective way to modify your Milwaukee M12 tool, allowing it to take Bosch batteries. Say goodbye to restrictions and hello to a wider range of battery options for your power tool needs. Let’s get started on this exciting modification!
Overview of Milwaukee M12 Tools
Introduction to Milwaukee M12 Tools
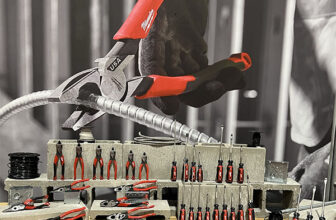
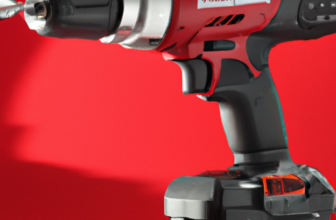
Milwaukee M12 tools are a popular choice among professionals and DIY enthusiasts due to their compact size and high performance. These tools are part of the M12 System, a line of innovative cordless power tools and accessories offered by Milwaukee Electric Tool Corporation. Designed to provide maximum productivity and versatility, M12 tools are known for their durability and reliability. Whether you need a drill, impact driver, or any other power tool, the Milwaukee M12 lineup has you covered.
Features and Specifications
Milwaukee M12 tools boast a range of impressive features and specifications that set them apart from the competition. These tools are powered by lithium-ion batteries, offering longer run-times and faster charging capabilities. With their compact and ergonomic designs, M12 tools are comfortable to use and allow for maneuverability in tight spaces. They are also equipped with advanced technologies such as brushless motors, which provide improved efficiency and extended tool life. Additionally, M12 tools often come with built-in LED lights, allowing for better visibility in dimly lit work areas.
Benefits of Modding M12 Tools
Modding your Milwaukee M12 tools to accept Bosch batteries can offer numerous advantages. Firstly, it expands the battery compatibility of your M12 tools, allowing you to use an alternative power source when needed. This can be particularly beneficial if you already own Bosch batteries or if you prefer the performance and features of Bosch battery technology. Modding also increases the versatility of your M12 tools, enabling you to use them in more diverse projects that may require different battery types. Lastly, it can save you money in the long run by eliminating the need to purchase additional Milwaukee batteries.
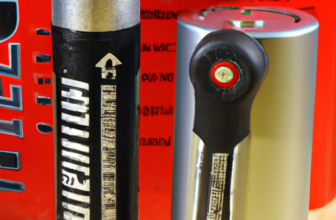
Compatibility of Milwaukee M12 and Bosch Batteries
Differences Between Milwaukee and Bosch Batteries
While both Milwaukee and Bosch produce high-quality batteries, there are notable differences between the two brands’ battery systems. One key difference lies in the voltage and configuration. Milwaukee M12 tools use a 12-volt battery system, while Bosch offers a range of different voltage options to suit various power tool applications. Additionally, the physical design of the battery connectors differs between the two brands, making compatibility a challenge without modifications.
Understanding Battery Voltage and Configuration
Before attempting to mod your Milwaukee M12 tools, it is crucial to understand the importance of battery voltage and configuration. Voltage refers to the amount of electrical potential a battery can provide, and different tools require different voltage levels for optimal performance. Additionally, the configuration, such as the number of cells within the battery pack, can affect the overall power capacity. When modding M12 tools to accept Bosch batteries, it is essential to match the voltage and configuration to ensure safe and reliable operation.
Why Mod Milwaukee M12 to Accept Bosch Batteries
Modifying your Milwaukee M12 tools to accept Bosch batteries opens up a plethora of possibilities. Bosch batteries offer higher capacity options, providing longer run-times and reducing the need for frequent recharging. Additionally, Bosch batteries are known for their durability and reliability, which can enhance the performance of your M12 tools. Modding your tools to accept Bosch batteries also allows for easier battery replacement, as Bosch batteries are widely available and compatible with various power tool brands.
Preparation
Identifying the Milwaukee M12 Tool Model
Before beginning the modification process, it is crucial to identify the specific model of your Milwaukee M12 tool. Different models may have varying internal designs and battery connections, which can affect the modding process. Refer to the product manual or labeling on the tool itself to ensure accurate identification.
Determining the Correct Bosch Battery Type
Choosing the right Bosch battery type is essential for a successful modding project. Research the available Bosch battery options and select the one that matches the voltage and configuration requirements of your Milwaukee M12 tool. Take note of the physical dimensions and shape of the battery to ensure compatibility with your tool’s battery compartment.
Gathering Required Tools
To successfully mod your Milwaukee M12 tool, you will need several tools and equipment. These may include a screwdriver set, soldering iron, wire cutters, heat shrink tubing, electrical tape, and a multimeter for testing purposes. Ensure you have all the necessary tools on hand before proceeding with the modification process.
Disassembling the Milwaukee M12 Tool
Powering off and Disconnecting the Tool
Before disassembling your Milwaukee M12 tool, ensure it is powered off and disconnected from any power source. This will prevent accidental injuries and damage to the tool or batteries. Make sure the tool is in a safe and stable position throughout the disassembly process.
Removing the Battery Compartment Cover
To access the internal components of the Milwaukee M12 tool, start by removing the battery compartment cover. This is usually secured by screws or clips. Use the appropriate tool, such as a screwdriver, to carefully remove these fasteners and gently detach the cover.
Separating the Tool Casing
Once the battery compartment cover is removed, you may need to separate the tool casing to gain access to the battery connector. This may involve removing additional screws or carefully prying open the casing. Take your time and refer to the tool’s manual or online resources for guidance specific to your model.
Locating the Battery Connector
Inside the Milwaukee M12 tool, locate the battery connector that needs modification. This is the component responsible for connecting the tool to the battery. Take note of its location and the type of connector used by Milwaukee.
Modding the Battery Connector
Examining the Milwaukee Battery Connector
Before making any modifications, take a close look at the Milwaukee battery connector. Observe its design and how it connects to the tool’s internal circuitry. This will help you understand the necessary modifications required for compatibility with Bosch batteries.
Making Necessary Modifications
Based on the analysis of the Milwaukee battery connector, determine the modifications required to accept Bosch batteries. This may involve adjusting the shape or size of the connector, ensuring compatibility with the corresponding Bosch battery connectors. Take precise measurements and make any necessary cuts or modifications to the existing connector.
Soldering or Wiring Bosch Battery Connector
To connect the Bosch battery to the modified Milwaukee battery connector, you will need to solder or wire them together. Follow proper soldering techniques and ensure a secure and reliable connection. Alternatively, you can use wiring methods such as crimping or splicing, depending on your skill level and available tools.
Securing the New Connector
Once the Bosch battery connector is properly connected to the modified Milwaukee battery connector, secure it in place within the tool. Use adhesive, heat shrink tubing, or other suitable methods to ensure the connectors remain firmly in place and prevent any loose connections or potential short circuits.
Performing Compatibility Tests
Verifying the Functionality of the Modified Connector
Before proceeding further, it is essential to verify the functionality of the modified battery connector. Use a multimeter to test for proper continuity between the modified connector and the tool’s internal circuitry. This step will help ensure a reliable connection and prevent any electrical issues.
Testing the Milwaukee M12 Tool with Bosch Battery
With the modified battery connector in place, it’s time to test the Milwaukee M12 tool with the Bosch battery. Insert the Bosch battery into the tool’s battery compartment, ensuring a secure fit. Power on the tool and engage various functions to confirm that it operates successfully with the Bosch battery.
Ensuring Proper Fit and Performance
During the compatibility tests, pay attention to the fit and performance of the Bosch battery in the modified Milwaukee M12 tool. Ensure that the battery sits securely and snugly within the battery compartment, without any excessive movement or wobbling. Test the tool’s performance under different load conditions and observe any differences compared to using the original Milwaukee battery.
Reassembling the Milwaukee M12 Tool
Reattaching the Tool Casing
Once the compatibility tests are successfully completed, it’s time to reassemble the Milwaukee M12 tool. Begin by reattaching the tool casing, carefully aligning and securing it with the appropriate screws or fasteners. Take care not to overtighten the screws, as this may damage the casing or internal components.
Replacing the Battery Compartment Cover
After the tool casing is securely in place, reattach the battery compartment cover. Ensure it aligns properly with the tool’s body and fasten it using the original screws or clips. Double-check that the cover is securely attached and provides adequate protection for the internal components.
Testing the Tool’s Functionality
Before considering the modification process complete, test the tool’s functionality one last time. Power it on using the Bosch battery and engage various functions to verify that everything works as intended. Monitor the tool’s performance and ensure it matches your expectations and requirements.
Safety Considerations
Working in a Well-Ventilated Area
Throughout the entire modding process, it is crucial to work in a well-ventilated area. This will help dissipate any potentially harmful fumes from soldering or adhesive materials. Open windows or use ventilation fans to maintain a safe working environment.
Using Personal Protective Equipment (PPE)
Wearing personal protective equipment (PPE) is vital when modding your Milwaukee M12 tools. This includes safety glasses or goggles to protect your eyes from any flying debris, gloves to safeguard your hands, and a dust mask or respirator to prevent inhalation of harmful particles or fumes.
Handling the Tools and Batteries with Care
Take care when handling both the Milwaukee M12 tools and the Bosch batteries. Avoid dropping or mishandling the tools, as this can cause damage to the internal components. When handling the batteries, ensure they are not exposed to extreme temperatures or conditions that may compromise their functionality or safety.
Tips and Troubleshooting
Properly Identifying Polarity and Voltage
When modifying the battery connector, ensure you properly identify the polarity and voltage requirements of your Milwaukee M12 tool. Incorrect connections can result in damage to the tool or batteries and potentially pose safety hazards. Refer to the tool’s manual, markings, or consult online resources for accurate information.
Addressing Connection Issues
If you encounter any connection issues during the modification process, double-check the soldering or wiring connections between the modified battery connector and the tool’s internal circuitry. Ensure there are no loose connections or short circuits that may hinder proper functionality. Troubleshoot any issues systematically, seeking guidance from experts if necessary.
Ensuring Compatibility with Specific M12 Models
While the modding process outlined in this article is applicable to many Milwaukee M12 tools, it is important to note that specific models may have unique internal designs or battery connector variations. Always refer to the tool’s manual or research specific modding guides for your particular model to ensure compatibility and avoid any potential issues.
Benefits and Limitations of Modding
Advantages of Using Bosch Batteries
Modding your Milwaukee M12 tools to accept Bosch batteries can provide several advantages. Bosch batteries often offer higher capacity options, allowing for longer run-times and increased productivity. They may also have advanced features such as fuel gauges, which provide valuable information about the remaining battery life. Additionally, Bosch batteries are often more readily available and compatible with other power tool brands, providing greater flexibility and versatility.
Possible Effects on Tool Warranty
It is important to note that modifying your Milwaukee M12 tools to accept Bosch batteries may have implications on the tool’s warranty. Manufacturers typically void warranties if any unauthorized modifications are made to their tools. Therefore, it is crucial to weigh the benefits against the potential loss of warranty coverage before proceeding with the modding process.
Understanding Potential Risks
Any modifications to power tools involve inherent risks. Modding your Milwaukee M12 tools may potentially damage the tool or pose safety hazards if not performed correctly. Always exercise caution, follow proper procedures, and consult professional advice when necessary. Understand that any modification is done at your own risk, and it is essential to take all necessary precautions to ensure safety and preserve the tool’s functionality.
This post may contain affiliate links which means I may receive a commission for purchases made through links. Learn more on my Private Policy page.