

This post may contain affiliate links which means I may receive a commission for purchases made through links. Learn more on my Private Policy page.
Introduction
Woodworking can be a very satisfying activity that allows you to create beautiful, unique pieces of furniture or décor for your home. However, it also requires a lot of time, effort, and the correct tools to achieve the desired results. One of these essential tools is the electric sander. In today’s article, we’ll focus on how to use an electric sander efficiently. We’ll also provide a brief overview of the different types of electric sanders on the market and the various sandpapers that you can use with them.
What is an electric sander?
An electric sander is a powerful tool that makes sanding much easier and faster compared to hand sanding. It works by rotating a sandpaper disc or oscillating back and forth, removing material from the wood surface. Electric sanders come in various shapes and sizes, with different types of sandpapers, allowing you to perform a wide range of sanding tasks.
The Black and Decker Mouse Sander
In the YouTube video, the Black and Decker Mouse Sander was used. This sander has a pointed tip, making it perfect for sanding in tight or ergonomic spaces, such as corners, curves, or uneven surfaces. This feature makes it stand out from other sanders, which can’t reach these areas easily. The Mouse Sander is also comfortable to use, thanks to its rubber grips on both the top and bottom. This feature gives you full control over the sanding process and reduces hand fatigue.
How to use an electric sander safely
One of the biggest concerns when using an electric sander is safety. The YouTube video highlighted a few safety tips that you should follow to avoid accidents and injuries. First, always wear protective gear, such as eyewear, ear muffs, a mask, and gloves to protect yourself from sawdust and debris. Sawdust can cause respiratory problems, so it’s vital to wear a mask to protect your lungs. Also, the noise produced by the sander can be harmful to your hearing, so ear muffs or earplugs are necessary.
Second, be sure to use the sander following the instructions provided by the manufacturer. Always ensure that it’s in the off position when plugging it in. The electric sander won’t start until you switch it on, which gives you control over its operation. When sanding, apply light pressure and let the sander do the work. Pushing too hard can damage the sandpaper, the sander, or even the wood itself.
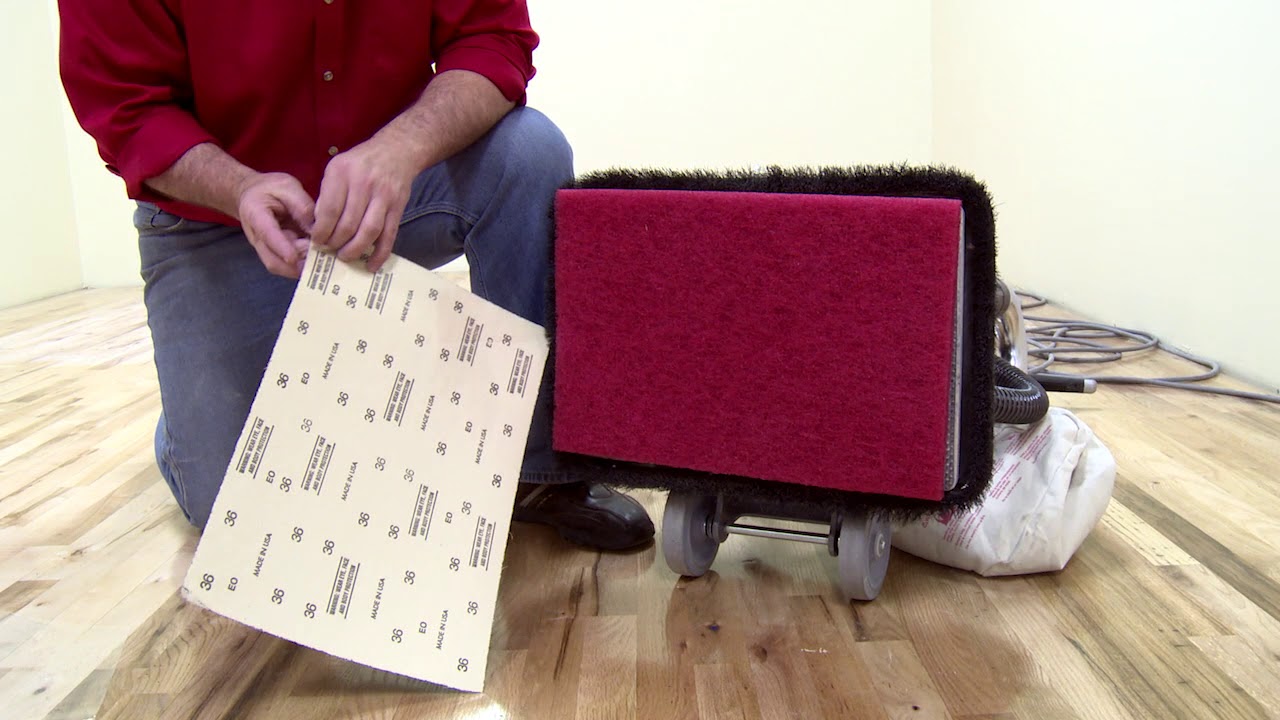
Types of Sandpapers for Electric Sanders
Using the right sandpaper is crucial when sanding with an electric sander. It can determine the quality and the finish of your project. There are typically two types of sandpapers – aluminum oxide and silicon carbide. Aluminum oxide sandpapers are the most commonly used for sanding wood. They are durable, produce a great finish, and come in various grits ranging from 36 to 220. Silicon Carbide sandpapers, on the other hand, tend to wear out quickly but produce a finer finish. They are ideal for sanding between coats of paint.
The grit number of sandpaper indicates how coarse or fine the paper is. The lower the number, the coarser the sandpaper, which can remove surface imperfections and stains faster. The higher the number, the finer the sandpaper, which is perfect for creating a smooth, polished finish. The Mouse Sander that was used in the YouTube video has a dust collector trap, which collects the sawdust that results from sanding. This collection feature means that you get a cleaner work environment. It’s essential to wear a mask, even with the dust collector, as some dust can escape, causing respiratory issues.
Changing Sandpapers on an electric sander
Most electric sanders come with a hook and loop mechanism that makes it easy to change sandpapers. Simply remove the old sandpaper, line up the new one, press it into place, and trim off any excess residue with a pair of scissors. Ensure that the sandpaper is straight and correctly lined up before switching on the sander to prevent uneven sanding or damage to the sandpaper.
How to Sand with an Electric Sander
Before sanding with an electric sander, ensure your workspace is clean and free of debris and that you have on all your protective gear. Then, begin by selecting the grit of sandpaper that will best suit your sanding needs. Start with a lower grit number, such as 60 or 80 if the wood has deep stains, scuffs, or rough surfaces. This coarse sandpaper will remove more material quickly, but take care not to overwork the area and cause damage to the wood. If your project only requires fine work, use sandpapers with a higher grit number, such as 180 or 220. Sand with the grain of the wood to avoid scratches or scuffing.
Conclusion
In conclusion, an electric sander is an essential tool for any woodworking enthusiast. It makes work easier, faster, and more efficient than traditional hand sanding methods. It’s important to follow safety guidelines and use the right sandpaper grit to achieve the desired results.
The Black and Decker Mouse Sander is an excellent choice for sanding tight spots and detailed work. Remember that proper maintenance is essential. It’s important to check the sander regularly to ensure it’s in good condition and to replace sandpapers that are worn out. With this guide, you’re well on your way to mastering the art of sanding with an electric sander. Happy woodwork!
This post may contain affiliate links which means I may receive a commission for purchases made through links. Learn more on my Private Policy page.


1:58 , i remember the first time i used it. i thought omg my neighbours are going to hate me. your videos are making me fall in love with my dreams of redecorating again 🙂 fuck the neighbours, i will follow my passion because this couple on youtube inspired me buddy 🙂
I’m a new subscriber so I don’t know if you’ve already shown one, or it you’d want to but how about a mini lathe. They are used for making small parts, like miniature furniture legs.
Thanks you answered many questions
Thank you for keeping this short and straight to the relevant points, very helpful!
Apparently there are sanders that you can connect to a vacuum cleaner. That’s a great idea.
How about a video using a mitre saw😃
Wow, thank you for your videos! We’re doing renovations right now and they helped me a lot to figure out how to use these tools
Greetings! Very useful advice within this article! Its the little changes that make the most significant changes. Thanks a lot for sharing!