This post may contain affiliate links which means I may receive a commission for purchases made through links. Learn more on my Private Policy page.
hello everyone welcome back to another
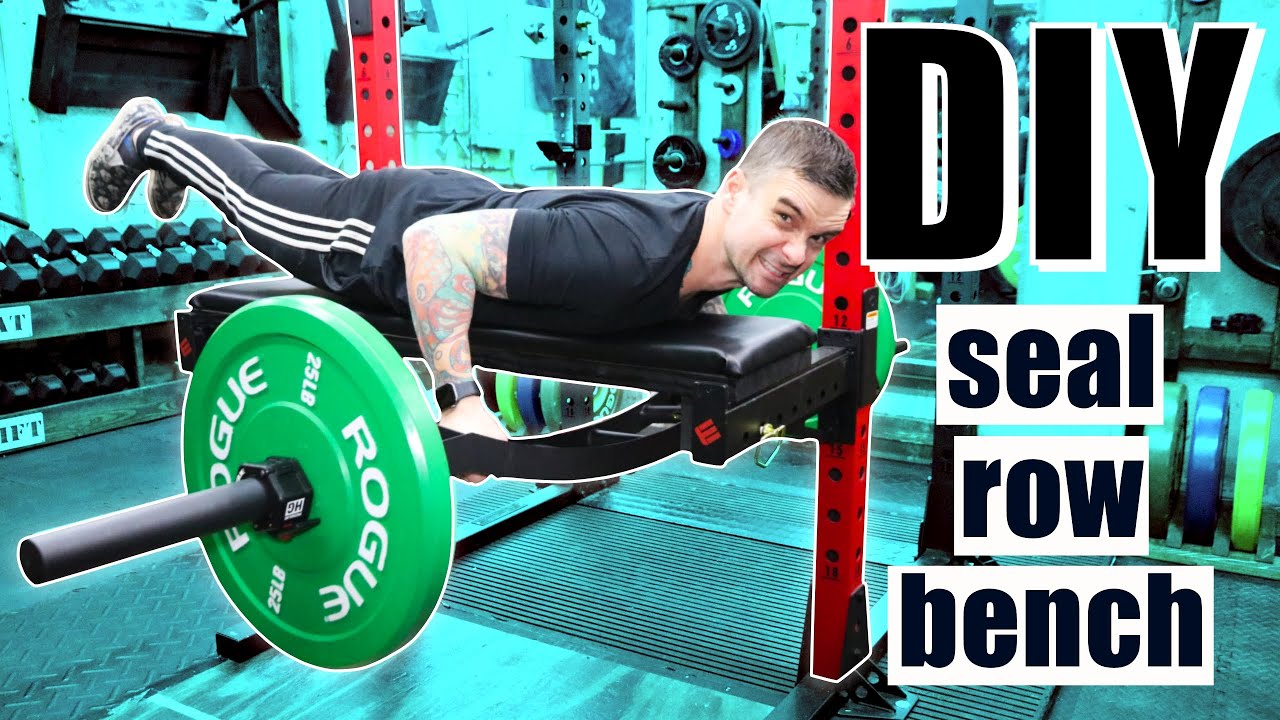
diy gym equipment video my name is Kyle and this week we're going to make a seal
row bench attachment for your power rack what are seal rows? they're rows that you perform
while laying horizontal the word seal comes from the tendency of the lifter to kick their legs
up while they're doing the lift there are many benefits to doing seal rows but the main benefit
is full activation of the lats while putting little to no pressure on the lower back there are
lots of options for purchasing a standalone seal row bench but they tend to be pretty pricey and
take up a lot of space that's why this is such a great build the materials cost me about 30 bucks
because i already had a lot of this stuff laying around if you're starting from scratch and buying
all the materials new it'll cost you around eighty to ninety dollars the total size is forty eight
by twelve by seven inches and it weighs just under twenty five pounds when i'm not using it
it conveniently fits behind my functional trainer it's a pretty versatile piece of equipment in
addition to seal rows i've also used it as an adjustable high plyo box it works great for hip
thrusts box squats body weight reverse hypers split squats it's the perfect support for my
preacher pad dumbbell step-ups ghd sit-ups and i can use it to turn my gym into a home office
okay enough chit chat let's build this thing safety first wear a dust mask wear eye protection
wear hearing protection diy projects are awesome but being safe is even more awesome i won't
be providing a cut list for this project all the dimensions will be based on your power rack
but i'll show you how to get the dimensions that you need to build this the full list of tools and
materials that i use is located in the description of this video as a bonus if you purchase from
any of those links it goes towards helping to support this channel i start off by cutting my 2
by 12.

You'll want to measure the distance to the outside of each safety for me it's 48 inches i'm
using a sliding miter saw but you can also use a circular saw for this next i find a piece of scrap
2×4 and cut it to two 10 inch pieces when in use i want to secure this to my safeties using hitch
pins i hold a 2×4 up to my safety and mark one of the holes with a pencil when drilling i stack
them and clamp them so the holes are identical these holes will allow me to attach to
my safety spotter arms using hitch pins by the way if you're watching this and thinking
it's a lot of work or you don't want to invest in the tools to build this that's okay too rogue
actually sells something very similar it's called the monster utility seat and it is solid as a
rock i have a link to it in the description of this video in terms of placing your two by fours
they'll go on the insides of the safeties you can place your two by twelve on the safeties and
mark it that way or just measure the safeties i'll be attaching the two by fours to the two by
twelve using three inch lag screws i use one and an eighth inch forstner bit and drill about a half
an inch deep this will make sure the lag screws sit flush once those are drilled i take a smaller
bit and drill all the way through the center after clamping the 2×4 in place i add lag
screws and washers and this part is done at this point you can call it a day
it works as a seal row bench perfectly i'd like to make mine a little more comfortable
to use i'll be adding a removable pad to the top if you're new to upholstery don't let this
scare you off i only learned recently and i'm definitely not a pro but it's really not
that bad if that still didn't convince you you can try using a yoga mat or just use a face
pillow like this guy these long rib cuts are much easier with the table saw but can also
be done with a circular saw or even a jigsaw i lay the 2 by 12 on top of the plywood so i can
mark and drill my holes these holes don't have to be perfectly symmetrical but it helps if you think
you may want to remove the pad at some point i clamp my pieces together before drilling the holes
i'll be using quarter inch bolts to attach these pieces so i use a 3 8 inch forstner bit to give
myself a little extra room you want to at least go deep enough to hit the plywood underneath flip
it around and do the same thing on the other side once i'm through the 2 by 12 i move it and
drill the rest of the way through the plywood i'm using prolonged t-nuts to secure the bolts
for the pad these just hammer in super easy i flip the plywood over and lay the 2 by 12 over
the top you'll want to make sure the holes line up before you move on to the next step mine line
up perfectly it's time to add the padding i'm using one inch thick foam if you want more
padding you can go thicker or just double up the foam will go on the same side as the t-nuts i
spray some adhesive down before placing the foam my foam is not quite long
enough but that's an easy fix i can use a scrap piece to
fill in the missing part the material i used to cover the foam is some
sort of fake vinyl i got a large roll for pretty cheap on amazon you'll want an excess
of about two and a half inches on each side after cutting the material i'm ready to staple it the trick to using the stapler is that you need to have the right staples and
the proper amount of pressure i'm using half inch staples because my plywood is
half inch the staple gun is powerful so i turn the pressure down pretty low you should make sure
to test the pressure before starting this step once that is set you just lay the fabric down
and staple be careful not to staple your fingers corners are tricky and i still haven't
figured out how to make them look good but as long as the staples
hold the fabric down it's fine i spray paint the 2 by 12 piece black before
attaching the pad i don't bother spraying the part that will be covered by the pad this next part is
super easy as long as your holes line up properly once the bolts are secure this thing is good to go you can do seal rows with dumbbells you can do
them with straight bars or even a curl bar but i prefer to use a camber bar because of the extra
range of motion they allow i currently have two camber bars bells of steel's arch nemesis swiss
bar and the titan multi-grip camber bar both cost around 200 and are great to have around the home
gym so that's it let me know what you think in the comments section below thanks for watching
don't forget to like comment and subscribe you
This post may contain affiliate links which means I may receive a commission for purchases made through links. Learn more on my Private Policy page.


