This post may contain affiliate links which means I may receive a commission for purchases made through links. Learn more on my Private Policy page.
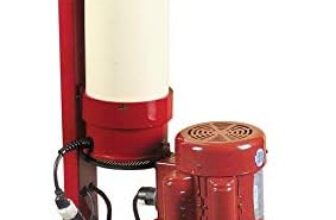
Introducing the American Sanders OBS 18 DC Square Buff Floor Sander
Hi, I’m Sandy from the Home Depot Rental Center. When you need a medium-duty sander that is ideal for the polishing and fine finishing of hardwood floors, we recommend the American Sanders OBS 18 DC Square Buff Floor Sander. This multi-purpose orbital sander is great for preparing to recoat your floor and for general maintenance. The orbital sanding action will help remove scratch patterns left by drum or rotary Sanders, leaving a smooth, flat floor ready for refinishing.
Before You Get Started
Now, before you get started, we recommend that you wear the proper protective gear, including protective eyewear, safety shoes, work gloves, and protective clothing. We also recommend that you always use a respirator and hearing protection while sanding.
Prepare your work area by countersinking any nails in the flooring, taping over electrical outlets, and covering doorways and windows with plastic. Be sure to cover all air vents in the room, including intake and output vents.
Step 1: Installing the Sandpaper
The first thing you’ll want to do before operation is install the sandpaper. Make sure the sander is not plugged into a power outlet. Never leave the machine unattended without unplugging it. Lay the machine on its back so you have access to the bottom of the sander.
Next, install either the white or the red pad onto the machine by pushing the pad into the grip face. The white pad is ideal for screening and recoating or polishing, while the red pad is best for sanding. Remove the backing paper from the sandpaper, then attach it to the pad so that the adhesive side is on the pad and the sandpaper side faces outward.
Step 2: Connecting the Power Cord
Lift the sander back up and connect the power cord on the machine to the extension cord provided with it. To do this, align the power connectors, push in, and twist. Plug the extension cord into a grounded outlet. Position the cord safely out of the way of the machine.
Release the handle and let it float in a comfortable operating position. While holding the handle with both hands, first push in and hold the safety switch, then squeeze the handles. Once the machine starts, you can release the safety switch.
Sanding with the OBS 18 DC Square Buff Floor Sander
This is an orbital machine, so you can sand in any direction and don’t have to stand in line with the grain of the wood. Allow the machine to do the work. The square shape of the pad lets you cover the entire floor, including the edges.
Keep the sander in motion while the motor is running to avoid damage and swirling. Throughout your sanding, it’s very important that you empty the dust bag regularly. The bag slips off the dust pipe and can be emptied by opening the zipper.
A good rule of thumb is to empty the bag when it’s about 1/3 full. On rare occasions, dust generated from sanding wood floors may contain certain floor coatings that can pose a fire hazard inside the bag, so never leave the sander unattended without emptying the dust bag first.
Always remove the dust bag from the machine at the end of the workday, placing the bag outside of the work area. Depending on the floor, expect a piece of sandpaper to cover anywhere from 75 to 150 square feet before needing to be replaced.
Screening and Recoating Process
The sander can also be used for the screening and recoating process, which is similar to sanding but uses an abrasive screen instead of sandpaper. This process scuffs up the top coat of the finish instead of completely removing it, allowing you to apply a fresh coat of finish to the floor.
Step 3: Stopping the Machine and Unplugging
When you’re done sanding, release the control levers to stop the machine. Unplug it from the power source and make sure to empty the dust bag completely to avoid any additional cleaning charges prior to returning the tool back to the rental center.
Step 4: Cleaning and Transporting the Sander
Clean all debris or materials from the machine with low-pressure air. When you’re ready to transport, properly secure the sander in your vehicle to avoid injury or damage to the tool. Visit your local Home Depot or homedepot.com/rentals to learn more about the best tools for your next project.
This post may contain affiliate links which means I may receive a commission for purchases made through links. Learn more on my Private Policy page.


